Blog

  • How to 3D Print High-Viscosity Castable Resins

    How to 3D Print High-Viscosity Castable Resins

    Introduction of 3D printing with high-viscosity castable resins 

    3D printing with high-viscosity castable resins presents a unique set of challenges and opportunities, particularly within resin-based additive manufacturing processes such as LCD, DLP, and SLA. These specialized resins, which are typically used for investment casting in jewellery, creating dental moulds, and producing high-detail prototypes, are formulated to burn out cleanly without residue, making them ideal for precision applications. However, their thicker consistency (higher viscosity) compared to standard resins makes them more difficult to process.

    Unlike low-viscosity resins that flow easily and self-level quickly, high-viscosity castable resins resist movement, making it harder for fresh resin to flow beneath the model during printing. This can lead to print failures, poor layer adhesion, or defects such as bubbles and incomplete curing. Additionally, the increased peel forces during layer separation and the need for optimal resin temperature further complicate the printing process.

    To achieve reliable and high-quality prints with these resins, users must fine-tune multiple aspects of the printing workflow. This includes selecting the right build plate surface, adjusting exposure and lift settings, maintaining proper resin temperature, and ensuring proper model orientation and support structures. Moreover, post-processing becomes even more critical to ensure clean burnout and final part accuracy.

    This article provides a comprehensive set of practical guidelines, tips, and best practices for successfully 3D printing with high-viscosity castable resins, helping both beginners and experienced users improve print consistency and quality in demanding applications.


    1. Choose the Right Build Plate Surface

    When printing with high-viscosity castable resins, one of the most critical factors affecting print success is the adhesion of the first few layers to the build plate. These resins, due to their thick consistency, do not flow or spread as easily as low-viscosity materials. As a result, the initial layers may not fully wet or bond to a smooth build plate surface, leading to print detachment or warping early in the process.

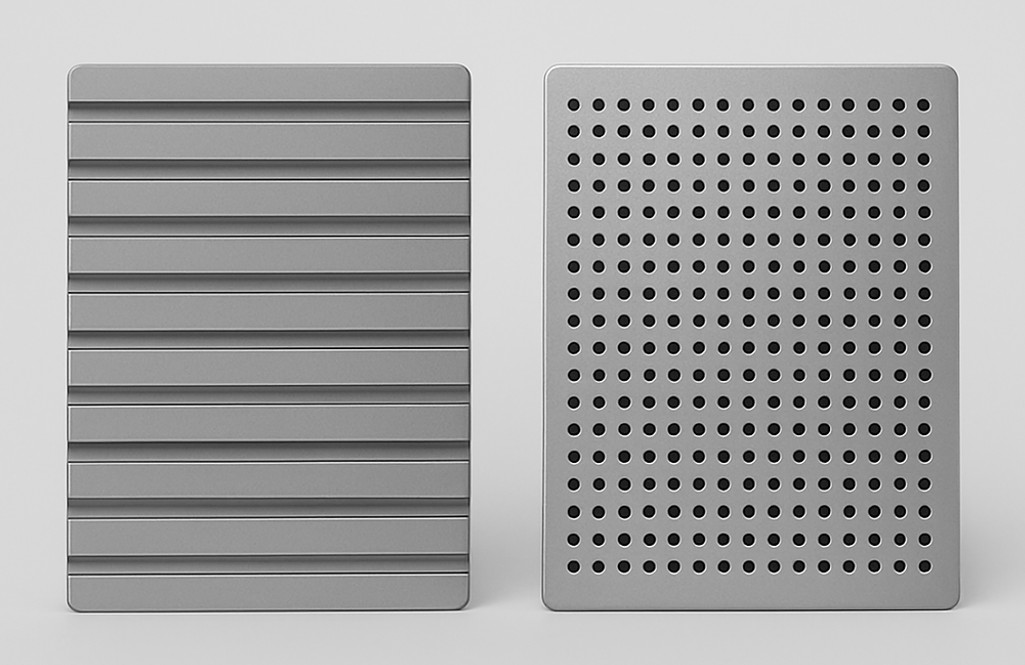
    • Grooved and Perforated Build Plates: Enhancing Mechanical Adhesion

    Using grooved or perforated build plates significantly improves the mechanical interlocking between the resin and the surface. These features provide physical “anchors” that allow the cured resin to grip onto the build platform more securely. The grooves and holes act as cavities into which the resin can flow and harden, creating a firm hold that is less reliant on chemical adhesion alone.
    How to 3D Print High-Viscosity Castable Resins

    This mechanical grip is particularly beneficial during the peel process in bottom-up resin printing technologies like LCD and DLP, where each new layer must be pulled away from the transparent FEP film. High-viscosity resins can create strong suction forces during this peel step, which may cause parts to detach if the bond to the build plate is insufficient. Grooved and perforated surfaces reduce the likelihood of such failures by stabilizing the print through better anchoring.


    • Surface Texture and Geometry Considerations

    While grooved and perforated plates offer better adhesion, their design must be balanced:

    • Grooves should not be too deep, as excessive texture can make part removal difficult and potentially damage delicate castable prints.
    • Perforation patterns (e.g., mesh or honeycomb structures) should be fine enough to enhance adhesion but not so aggressive that they imprint visibly on the printed object.
    • Surfaces with fine diagonal or crosshatch grooves offer a good compromise, increasing surface area and grip without compromising part quality.
    • Avoid Smooth Surfaces

    Build plates with mirror finishes or overly smooth coatings are generally not suitable for high-viscosity castable resins. These surfaces may cause the initial layers to slip or fail to bond, especially if the resin is thick and slow-moving. Even if the print starts correctly, weak adhesion can lead to failures mid-print when the part is under stress during layer separation.

    • Maintenance and Cleanliness

    Regardless of texture, a build plate must always be clean and properly levelled:

    • Resin residue, cured particles, or dust can interfere with adhesion.
    • Misalignment can cause uneven layer curing, leading to detachment at weaker spots.

    Regular cleaning with isopropyl alcohol (IPA) and gentle sanding (if applicable) can help maintain surface performance over time.


    1. Optimize Layer Settings for castable resins

    High-viscosity castable resins require careful tuning of printing parameters to ensure successful curing, proper layer formation, and stable part adhesion. Unlike low-viscosity resins that self-level quickly and require minimal tuning, high-viscosity resins behave more sluggishly, making timing, curing energy, and movement settings far more critical. Here are the most important layer-related parameters to optimize:

    How to 3D Print High-Viscosity Castable Resins

    • Bottom Exposure Time

    The bottom exposure time defines how long the printer cures the first few layers of the print. With thick resins, light penetration through the material is more difficult due to:

    • Reduced optical clarity,
    • Slower flow that prevents even spreading,
    • Potential pigment load in specialized castable formulas (such as red or green castable resins).

    To compensate:

    • Increase bottom exposure time significantly (often 50–100% more than for standard resins).
    • Typical values may range from 30 to 60 seconds, depending on the resin and printer’s light source.
    • This ensures that the resin cures deeply and bonds tightly to the build plate, forming a strong foundation.
    • Number of Bottom Layers

    The number of bottom layers also affects overall adhesion and strength at the base:

    • For high-viscosity resins, increasing the number of bottom layers to 6–10 (or even more for tall or heavy models) is recommended.
    • Each of these layers helps gradually build a robust base that can withstand the peeling forces during printing.

    More bottom layers:

    • Compensate for any minor inconsistencies in curing caused by the resin’s thickness,
    • Distribute stress more evenly, reducing the likelihood of part detachment in early layers.
    • Normal Exposure Time

    Once the base is formed, normal exposure time (for all remaining layers) must be adjusted appropriately:

    • High-viscosity resins often require 10–30% longer exposure per layer than lower-viscosity alternatives.
    • A good starting point is 6–9 seconds per layer, depending on resin opacity, printer LCD power, and layer height.

    Tip: Test exposure time using validation prints (e.g., exposure test models or calibration rings) to dial in the ideal settings before printing complex geometries.

    • Lift Speed and Lift Height

    Because of the resin’s thickness, the time it takes for fresh resin to flow under the model between layers is increased.

    To allow proper resin replenishment:

    • Reduce lift speed to minimize suction forces and avoid mechanical shock to the model.
    • Increase lift height to create enough vertical clearance for resin to flow evenly.
    • Add a sufficient delay after lifting (wait before next exposure) to allow the resin to settle back into place before the next layer begins.

    Typical settings for high-viscosity resins:

    • Lift speed: 30–60 mm/min
    • Lift height: 5–8 mm
    • Wait time after lift: 2–5 seconds

    These settings prevent the formation of bubbles, voids, and underexposed areas due to poor resin flow.

    • Layer Thickness (Z-Height)

    Although high-resolution prints often use 0.025–0.05 mm layers, printing castable resins at such thin layers can be problematic when viscosity is high. Thicker layers may be preferable:

    • Use 0.05 mm or 0.1 mm layer height for better flow and more reliable results.
    • Thicker layers reduce the number of peel steps, minimizing stress on the model and printer.


    1. Temperature Control

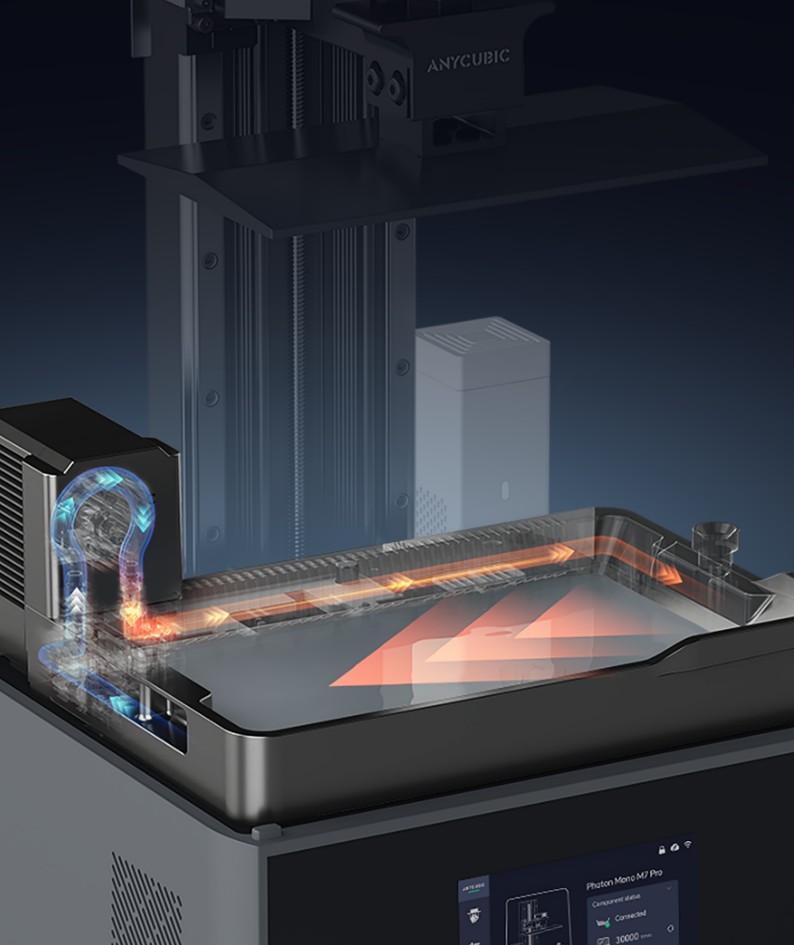
    Controlling the temperature of the printing environment and the resin itself plays a critical role in the success of 3D printing with high-viscosity castable resins. These resins tend to be thick and slow-moving at room temperature, which can hinder proper layer formation, delay resin flow, and increase the risk of printing defects such as incomplete curing, bubbles, and failed supports.
    How to 3D Print High-Viscosity Castable Resins

    Proper temperature management significantly improves resin flow, layer adhesion, and overall print reliability. Here’s how to effectively implement it:

    • Why Temperature Matters for High-Viscosity Resins

    High-viscosity resins exhibit non-Newtonian fluid behaviour, meaning their flow properties change under temperature and stress. At lower temperatures, they:

    • Flow more slowly,
    • Take longer to refill between layers,
    • Exhibit increased internal resistance (drag), and
    • Tend to trap bubbles or form uneven layers.

    At slightly elevated temperatures, their viscosity decreases, allowing:

    • Easier resin movement beneath the print,
    • Better surface levelling between layers,
    • Improved curing uniformity,
    • Enhanced resolution and surface finish.

    This is especially important in resins designed for investment casting (e.g., wax-filled or pigmented castable resins), where pigment density and filler particles further thicken the material.

    • Ideal Temperature Range

    Most high-viscosity castable resins respond well to mild heating:

    • The recommended temperature range is 30°C to 35°C (86°F to 95°F).
    • At this temperature, resin flows more freely without altering its chemical stability or curing behaviour.

    Some manufacturers may specify optimal temperature ranges in their datasheets. Always refer to the resin-specific documentation to avoid issues related to material degradation.

    • How to Maintain Resin Temperature

    Depending on your printer setup and environment, you can maintain optimal temperature in several ways:

    1. Built-in Resin Heater (if available)
    • Some advanced printers (e.g., Prosen Sonic Mighty 8K, Anycubic Photon M5s) come with built-in resin heating systems.
    • Enable the heater through the printer’s touchscreen menu and allow the resin to preheat for 10–15 minutes before starting the print.
    1. External Resin Heating Pads or Sleeves
    • Flexible silicone heater wraps designed for resin vats or bottles can gently raise the temperature.
    • Use a digital temperature controller to prevent overheating.
    • Avoid heating directly with open heat sources (e.g., hairdryers or heat guns), which can cause uneven heating or thermal stress.
    1. Heated Enclosure or Warm Room
    • Print in a temperature-controlled environment (ideally 25°C to 30°C).
    • Enclose your printer in an insulated box or tent to retain warmth.
    • Use a small ceramic heater or incubator-style heating element with a thermostat to keep the enclosure warm and stable.
    • Warming Resin Before Use

    Even before pouring the resin into the vat:

    • Pre-warm the resin bottle by placing it in warm water (not boiling) for 10–15 minutes.
    • Gently rotate or shake the bottle (after warming) to ensure even temperature distribution and proper mixing of pigments or additives.

    Avoid excessive shaking, which can introduce air bubbles. Instead, invert the bottle slowly or use a resin mixing wand.

    • Avoiding Overheating

    While mild heating improves resin flow, overheating must be avoided. Excessive temperatures (above 40–45°C) can:

    • Cause the resin to start prematurely curing inside the vat,
    • Degrade its chemical stability,
    • Alter mechanical properties of the printed part,
    • Create excessive odor or fumes.

    Use digital thermometers or infrared sensors to monitor resin temperature regularly. If you notice thickened gel-like consistency or clumping, stop the print and inspect the resin for signs of thermal damage.


    1. Resin Stirring and Handling

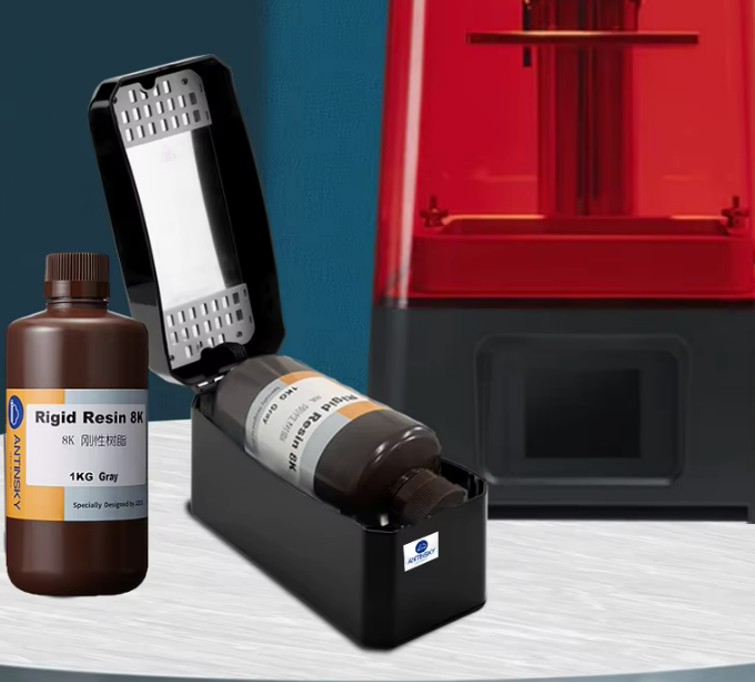
    High-viscosity castable resins, especially those formulated for investment casting or dental applications, contain various additives—such as pigments, fillers, and waxes—that can settle or separate over time. Proper stirring and handling of the resin are essential for consistent print quality, dimensional accuracy, and reliable burnout performance.
    How to 3D Print High-Viscosity Castable Resins

    Failing to mix the resin properly can result in:

    • Uneven exposure and curing,
    • Weak or brittle prints,
    • Inconsistent colour or surface finish,
    • Failed supports or detached features, and
    • Residue during casting due to pigment clumping.

    Here’s how to handle and prepare the resin correctly:

    • Stirring Before Each Print Session

    Always stir the resin thoroughly before each print, whether you’re using a fresh bottle or reusing resin from the vat. This ensures uniform dispersion of:

    • Suspended particles (such as wax content in castable resins),
    • Pigments (which affect curing and appearance), and
    • Photoinitiators (which control how well the resin cures under UV light).

    Best practices:

    • Use a plastic or silicone spatula or a resin-safe stirrer.
    • Stir gently but thoroughly for 2–5 minutes, reaching the bottom of the container or vat.
    • Avoid vigorous shaking that introduces bubbles, especially for high-viscosity resins that trap air easily.
    • Reusing Resin from the Vat

    If the resin has been sitting in the printer’s vat for several hours or days:

    • Visually inspect it for signs of pigment separation, surface film, or hardened particles.
    • Gently stir the resin in the vat using a soft tool that won’t damage the FEP film.
    • For longer idle times (e.g., overnight or longer), it’s recommended to filter the resin before reuse to ensure no cured bits or debris are present.
    • Filtering the Resin

    Filtering is especially important after failed prints or prolonged storage:

    • Use a resin filter funnel or fine mesh paint strainer (100–200 microns).
    • Pour the resin back into the original bottle or another clean container.
    • Remove any hardened particles, dust, or skin formed on the resin surface.

    This step prevents:

    • Contamination of the vat or LCD screen,
    • Clouding or scratching of the FEP film,
    • Curing inconsistencies in future prints.
    • Storage and Shelf Life

    High-viscosity resins are more prone to separation over time, so proper storage is vital:

    • Store resin bottles in a cool, dark, and dry place, ideally between 15°C and 25°C.
    • Keep bottles sealed tightly when not in use to prevent moisture absorption and premature polymerization.
    • Shake or stir bottles every few weeks if unused for extended periods.

    Always check the expiration date and resin condition before printing. An expired or improperly stored resin can yield poor results even with correct settings.

    • Tools for Efficient Handling

    To streamline handling and reduce human error:

    • Use a magnetic stirrer for consistent mixing, especially for larger resin bottles.
    • Invest in resin mixing wands or drill-mounted stirrers with low-speed control.
    • Keep a set of dedicated resin tools for each type or colour to avoid cross-contamination.


    1. Use Proper Supports

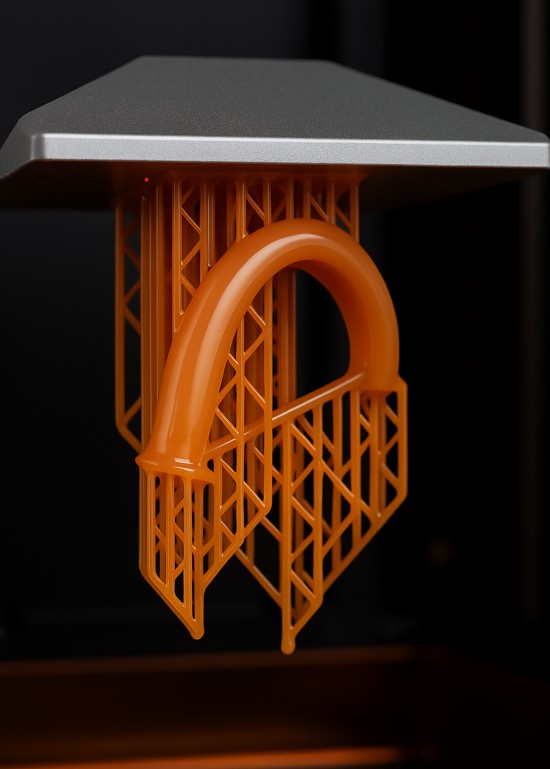
    In resin-based 3D printing, support structures are essential for holding parts in place during the print, especially for overhangs, bridges, and delicate features. When using high-viscosity castable resins, the importance of well-designed supports increases significantly due to the mechanical stresses introduced during layer separation (peeling) and the resin’s resistance to flow.
    How to 3D Print High-Viscosity Castable Resins

    These resins tend to resist motion and exert greater suction forces during each peel cycle, especially in bottom-up systems like LCD and DLP printers. If the supports are weak, under-sized, or improperly placed, parts may shift, detach, or warp, leading to complete print failure.

    Here’s how to design and implement optimal supports for reliable results:

    • Stronger, Thicker Support Beams

    High-viscosity resins create more resistance during printing. To counter this:

    • Use thicker support shafts (e.g., 0.5–1.0 mm or more depending on model size).
    • Increase the tip size and contact depth to provide stronger attachment points to the model.
    • Select heavy support presets in slicers (e.g., Lychee, ChiTuBox, Voxeldance Tango) rather than lightweight or minimal profiles.

    These measures improve the stability of delicate features and reduce the risk of “floating islands” or mid-print failures caused by insufficient support strength.

    • Anchor Points and Support Density

    For heavy or tall models:

    • Increase the density of supports, especially in the first 1–2 cm of the print where peeling forces are highest.
    • Ensure each island or separated feature has at least 2–3 support connections.
    • Use base platforms or rafts to distribute forces and prevent individual supports from detaching during printing.

    You can also use bracing structures (cross-links between support beams) to strengthen tall or fragile supports and reduce vibration during the Z-lift.

    • Optimal Model Orientation

    Positioning the model at an angle plays a key role in improving print success with high-viscosity resins:

    • Tilt the model between 30° and 45° on the X or Y axis (or both).
    • Angled positioning:
        • Minimizes the cross-sectional area exposed per layer, reducing peel forces.
        • Helps resin flow back beneath the part more easily after each lift.
        • Encourages better support coverage under overhangs and critical features.

    Models oriented flat or vertically may require more aggressive supports and are more prone to warping or failure when printed with thick resins.

    • Contact Point Considerations

    Castable resin prints are often small and highly detailed, meaning that support contact points must be carefully balanced:

    • Too large, and they may damage the surface or require excessive post-processing.
    • Too small, and the model may break off during printing due to the added force needed to separate each layer.

    Use medium to heavy contact points (e.g., 0.3–0.6 mm tips) and place them in non-critical or hidden areas of the model when possible. Some slicers offer automatic support painting to make this process more efficient.

    • Post-Processing and Support Removal

    Supports printed with high-viscosity resins tend to be more rigid and may cure harder than standard resins. Therefore:

    • Remove supports soon after printing, before full post-curing.
    • Use flush cutters or specialized support-removal tools.
    • If supports are difficult to remove, soak the print briefly in warm isopropyl alcohol (IPA) to soften them slightly.

    Careful removal prevents surface damage, especially in models destined for investment casting, where surface quality directly affects the final mould.


    1. Resin Drainage and Venting

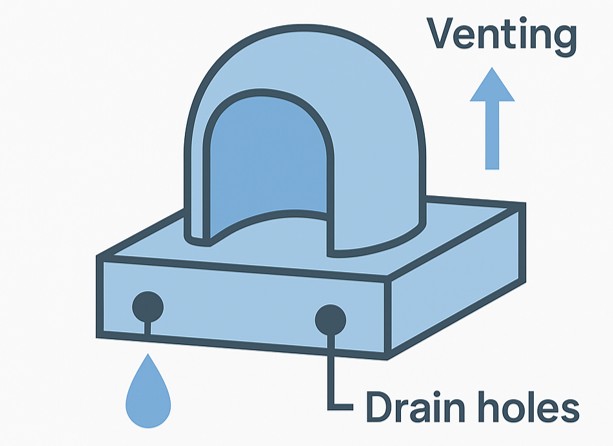
    When printing hollow or partially enclosed models using high-viscosity castable resins, proper drainage and venting are essential. These resins are thicker and flow more slowly than standard resins, making them particularly prone to trapping uncured resin inside cavities or creating strong suction forces during layer separation.
    How to 3D Print High-Viscosity Castable Resins

    If the resin cannot escape or air cannot enter enclosed areas during the print, the result can be:

    • Internal resin buildup that never cures,
    • Vacuum suction effects that cause parts to tear or detach mid-print,
    • Cracks, warping, or blowouts during post-curing or casting due to pressure buildup inside the part.

    To prevent these issues, careful design for resin flow and air exchange is necessary.

    • Why Drainage and Venting Are Critical for High-Viscosity Resins

    High-viscosity resins do not self-level or escape confined spaces easily. During printing, especially in inverted (bottom-up) printers:

    • As each layer is lifted from the FEP film, a vacuum can form inside hollow sections if resin has no way to escape.
    • With thicker resin, this vacuum is stronger and takes longer to break, resulting in layer shifting, suction lines, or complete print failure.
    • Uncured resin that remains trapped inside cavities can leak, affect part weight, interfere with casting, or cause cracking during curing or burnout.
    • How to Design Drain Holes

    If your model is hollow or contains internal cavities:

    • Add drain holes at the lowest points of the model (based on its printing orientation) to allow excess resin to escape.
    • Use at least 2 holes (entry and exit) so resin can flow out and air can flow in.
    • Recommended hole sizes:
        • Minimum 2.0 mm diameter for standard use,
        • 3–5 mm for thick resin or larger volumes.

    Examples of good drain hole placement:

    • Inside ring bands (bottom of the shank),
    • Bottoms of hollow figurines or jewellery parts,
    • Inside tubes, channels, or tanks.

    You can later plug or repair these holes post-processing if needed.

    • Venting to Avoid Pressure Buildup

    In addition to drainage, vent holes are needed to:

    • Prevent air pockets from forming in sealed chambers,
    • Avoid internal pressure during the peel process or during UV post-curing and burnout stages in casting.

    Without venting, air cannot displace the draining resin, resulting in:

    • Incomplete drainage,
    • Resin trapping,
    • Deformation of thin walls,
    • Internal cracking due to expanding gas in the burnout kiln.

    Position vent holes at the topmost points of the model (based on print orientation), opposite the drain holes. These allow air to enter as resin flows out.

    • Slicer Tools and Model Checks

    Most slicer software doesn’t automatically warn you about unvented cavities, so it’s up to the designer to:

    • Run hollow model detection in mesh repair tools (e.g., Meshmixer, Netfabb),
    • Check for “watertight” geometry that may unintentionally seal off inner areas,
    • Simulate print orientation to identify resin traps.
    • Alternative Methods for Internal Support and Drainage

    For complex internal geometries:

    • Use lightweight lattice infills instead of fully hollow interiors. These allow resin to drain more easily while maintaining part strength.
    • Consider removable plug-in vent holes, where temporary stoppers can be inserted after printing and cleaning.


    1. Post-Processing Tips

    Post-processing is a crucial phase in the resin 3D printing workflow—particularly when using high-viscosity castable resins, which often leave behind sticky residues or internal uncured resin due to their thick, pigment-rich compositions. These resins are typically used in demanding applications like jewellery casting, dental models, and high-precision prototyping, where surface quality and dimensional accuracy are paramount.
    How to 3D Print High-Viscosity Castable Resins

    Proper post-processing ensures:

    • Full removal of uncured resin,
    • Cleaner surfaces,
    • Better mechanical properties, and
    • Improved burnout performance in casting.

    Here are the essential steps to follow:

    • Initial Rinse: Removing Surface Resin

    Immediately after the print is removed from the build plate:

    • Rinse it thoroughly in 95–99% isopropyl alcohol (IPA), denatured alcohol, or resin-specific cleaners like Elegoo Resin Cleaner or Mean Green (if compatible).
    • Use a two-stage rinse:
      1. First container: removes the bulk of uncured resin.
      2. Second container: provides a cleaner wash and prevents recontamination.

    For best results:

    • Gently agitate the part in the bath using a soft brush or by swirling it in the alcohol.
    • Avoid prolonged soaking (especially more than 5–10 minutes), which can cause softening or surface swelling in some delicate castable resins.
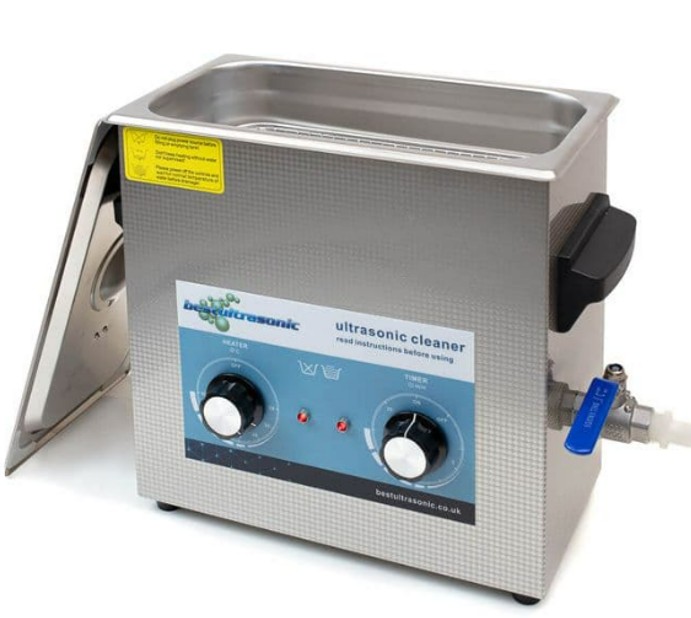
    • Ultrasonic Cleaning (Optional but Recommended)

    For parts with fine details, deep crevices, or highly pigmented resins, using an ultrasonic cleaner is highly recommended:

    • Place the part in a container filled with IPA or resin cleaner and submerge it in the ultrasonic tank (filled with water).
    • Run the ultrasonic cycle for 3–5 minutes but avoid overly long sessions which could damage fragile parts.

    Ultrasonic waves help:

    • Dislodge resin from small holes and surface textures,
    • Ensure uniform cleaning without manual scrubbing,
    • Reduce risk of residue that can affect curing or casting.
    • Drying the Part

    After cleaning:

    • Air-dry the part or use compressed air to blow out residual IPA, especially from holes, undercuts, or internal cavities.
    • Ensure that no trapped alcohol remains inside hollow models, as it can cause cracking or bubbling during UV curing.

    Allow the part to dry completely before moving to the curing stage.

    • Post-Curing Under UV Light

    Post-curing strengthens the printed part and completes the polymerization process:

    • Use a UV curing chamber or high-power UV lamp (405 nm wavelength is standard for most castable resins).
    • Cure time depends on resin type, part geometry, and UV intensity—typically 5–30 minutes per side.
    • Rotate or reposition the part during curing to ensure all surfaces are evenly exposed.

    For castable resins, over-curing can sometimes lead to excessive brittleness, while under-curing may leave the part too soft and affect burnout. Always follow the manufacturer’s specific instructions.

    Tip: Use a turntable inside the curing chamber for better exposure and consider curing parts submerged in water or glycerine (if the resin allows) to reduce oxygen inhibition and improve surface curing.

    • Support Removal (Before or After Curing?)
    • For brittle castable resins, it’s often best to remove supports before post-curing, while the material is still slightly flexible.
    • Use flush cutters or precision snips, and sand or file contact points as needed.
    • If supports are hard to remove or risk damaging the model, partially cure the part first, remove supports, and then finish the curing cycle.
    • Final Surface Preparation (Optional for Casting)

    Depending on the application:

    • For direct casting, leave the surface as-is to preserve dimensional fidelity.
    • For visual models, you may lightly sand, polish, or prime the surface.
    • Use UV-blocking primer to prevent over-curing if the model will be exposed to sunlight before casting.


    Conclusion

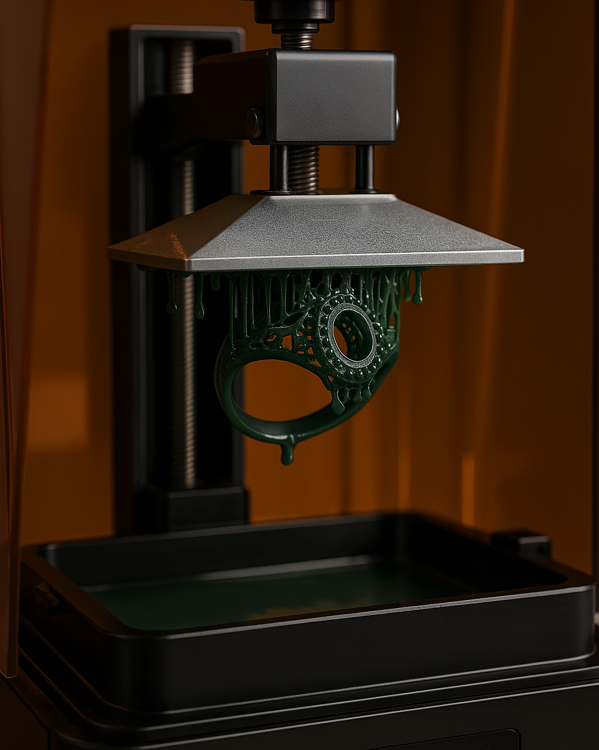
    Successfully printing with high-viscosity castable resins requires a combination of optimized hardware, software, and material handling techniques. From selecting the right build plate surface to adjusting exposure settings and ensuring proper temperature control, each step contributes to higher print reliability and better final quality. With the right approach, even the thickest resins can produce precise, high-performance results.
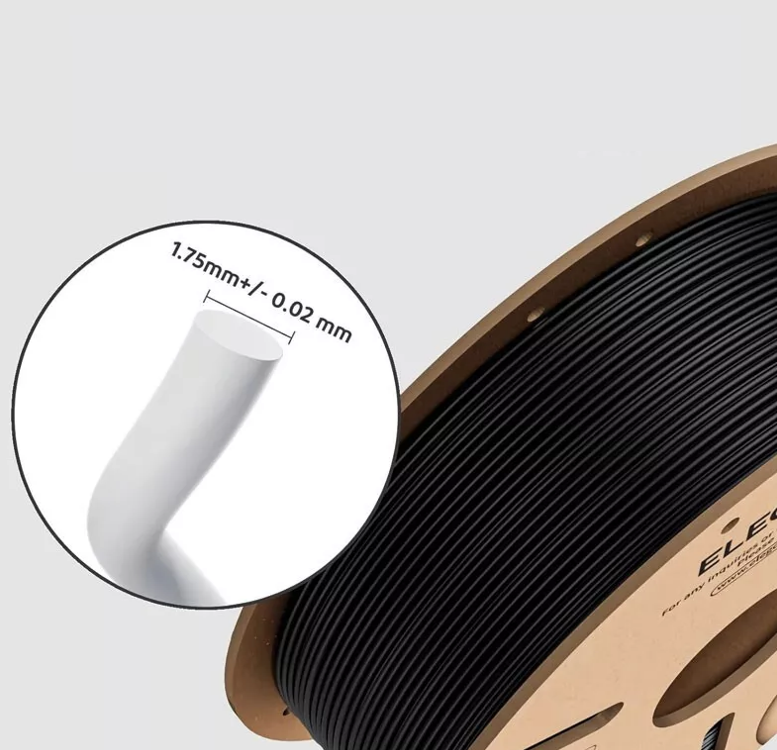
  • Precision Matters: How 3D Printer Filament Diameter Accuracy Affects Quality & Strength

    Precision Matters: How 3D Printer Filament Diameter Accuracy Affects Quality & Strength

    Introduction

    One of the critical parameters influencing the overal quality and mechanical properties of 3d printed products is the accuracy of the filament diameter used during the printing process. Even slight variations in diameter can lead to significant defects, affecting both aesthetics and functionality. This article explores the significance of filament diameter accuracy in ensuring superior surface quality and structural strength in 3D-printed models, along with best practices for maintaining precision.

    1. Understanding Filament Diameter Accuracy in 3D Printing

    1.1 Definition of Filament Diameter Accuracy

    3D printing filament diameter accuracy refers to the consistency of filament diameter across its length. It ensures uniform material flow during extrusion, reducing variability in printed models. This parameter is crucial for maintaining print quality, especially in precision engineering applications.

    1.2 Measurement and Tolerances

    Filament manufacturers specify diameter tolerances, typically ±0.02 mm to ±0.05mm for high-quality filaments. Inconsistencies beyond this threshold can result in unreliable extrusion, affecting print accuracy and durability. Measuring tools like digital callipers and laser micrometres help in assessing these tolerances, ensuring that only materials within the accepted range are used.

    1.3 The Role of Nozzle Diameter

    The nozzle diameter significantly influences how filament variations impact print quality. A larger nozzle may be more forgiving, while smaller nozzles used for high-detail prints require highly consistent filament diameters to prevent blockages and inconsistent extrusion.


    2. Impact of Diameter Accuracy on Surface Quality

    2.1 Layer Consistency and Print Artifacts

    Inconsistent filament diameter leads to fluctuations in extrusion, causing under-extrusion (gaps and weak layers) or over-extrusion (bulging and surface roughness). These artifacts impact the aesthetic and functional quality of prints, often requiring additional post-processing to correct surface defects.

    2.2 Surface Smoothness and Precision

    Precise diameter control ensures even layer deposition, leading to smoother surfaces with minimal post-processing requirements. This is particularly crucial for models requiring fine details and high-resolution printing, such as detailed prototypes, dental models, and figurines.

    2.3 Reduction of Stringing and Oozing

    Filament diameter inconsistencies affect extrusion rates, contributing to excessive oozing and stringing, which degrade the overall finish of the model. This is especially problematic in materials like TPU and PETG, where precise extrusion control is necessary to minimize artifacts.

    2.4 Effects on Support Structures

    When filament diameter accuracy fluctuates, support structures can become weak or overly rigid, making them difficult to remove cleanly. This can damage delicate models, necessitating careful tuning of filament consistency to maintain the balance between strength and removability.


    3. Influence of Filament Diameter Accuracy on Strength and Mechanical Properties

    3.1 Interlayer Bonding and Structural Integrity

    Variations in filament diameter impact material flow and layer adhesion. Poor bonding weakens structural integrity, making prints susceptible to delamination and failure under load. Proper interlayer adhesion is crucial for applications requiring durable and functional components, such as automotive parts and medical devices.

    3.2 Uniformity in Stress Distribution

    Consistent extrusion leads to even stress distribution within the printed model, enhancing its mechanical performance. In contrast, fluctuations in material feed create weak points prone to cracking under mechanical stress. This is particularly relevant for engineering applications where tensile and compressive forces must be evenly distributed.

    3.3 Impact on Load-Bearing Capacity

    For load-bearing components, precision in filament diameter ensures accurate infill density and wall thickness, directly affecting strength and durability. High-performance filaments such as carbon-fibre-reinforced PLA and nylon rely heavily on accurate filament diameter to maintain mechanical integrity.

    3.4 Effect on Functional Prints and Moving Parts

    Functional prints, such as gears, bearings, and articulated parts, require precise material flow for tight tolerances. Filament diameter inaccuracies can lead to poor fitment, excessive friction, or mechanical failure in moving parts.


    4. Factors Influencing Diameter Accuracy and How to Control Them

    4.1 Filament Manufacturing Quality

    High-quality filaments undergo rigorous testing for consistent diameter control. Choosing reputable suppliers reduces the risk of variations. Some premium filaments come with a certificate of diameter consistency, ensuring reliability.

    4.2 Printer Calibration and Extruder Setup

    Regular calibration of the extruder, including checking stepper motor settings and nozzle size, ensures accurate material flow and compensates for minor filament inconsistencies. Factors such as extrusion multiplier (flow rate) adjustments in slicer settings help compensate for slight variations.

    4.3 Storage and Handling

    Filaments can absorb moisture, causing swelling and inconsistency in diameter. Proper storage in airtight containers with desiccants preserves filament quality. Moisture-sensitive materials like nylon and PVA require additional drying before use to prevent extrusion problems.

    4.4 Effect of Temperature on Filament Behaviour

    Extreme temperatures during filament storage or printing can affect diameter consistency. Thermal expansion can cause extrusion variations, making temperature control an important factor in maintaining dimensional stability.


    5. Practical Considerations for High-Quality Prints

    5.1 Selecting the Right Filament for Strength and Surface Quality

    Choosing the right material, such as PLA for smooth surfaces or ABS for toughness, in combination with precise diameter control, optimizes print performance. For high-strength applications, materials like polycarbonate and carbon-fibre-reinforced filaments require tight tolerance control.

    5.2 Using Advanced Extrusion Compensation Techniques

    Modern slicers incorporate compensation settings to adjust for filament inconsistencies, improving print accuracy and reliability. Flow rate adjustments, retraction tuning, and extrusion width fine-tuning help counteract minor diameter fluctuations.

    5.3 Post-Processing Techniques for Enhanced Surface Finish

    Even with precise diameter control, techniques like sanding, vapor smoothing, or resin coating can further refine surface quality. Chemical smoothing, such as acetone vapor treatment for ABS, can enhance surface finish by dissolving minor inconsistencies.

    5.4 Testing and Quality Control Measures

    Using test prints such as calibration cubes and extrusion flow tests can help detect filament inconsistencies before starting a critical print. Implementing quality control measures ensures that filament diameter variations do not compromise print integrity.


    Conclusion

    Filament diameter accuracy in 3D printing is a fundamental factor affecting both surface quality and mechanical strength. Ensuring precise filament control enhances layer consistency, reduces print defects, and optimizes the structural integrity of the final model. By selecting high-quality materials, calibrating printers, implementing extrusion compensation, and monitoring filament storage conditions, manufacturers and hobbyists can achieve superior 3D-printed results with minimal defects. Understanding and controlling filament diameter accuracy will not only improve the aesthetic appeal of prints but also enhance their durability and functionality, making it a crucial consideration in professional and industrial 3D printing applications.

  • The Importance of STEAM Toys for Kids’ Development

    The Importance of STEAM Toys for Kids’ Development

    In today’s rapidly evolving world, education is no longer confined to classrooms. Play has become a powerful medium for learning, especially with the rise of STEAM toys—educational playsets designed to nurture Science, Technology, Engineering, Arts, and Mathematics skills. These toys promote creativity, problem-solving, and hands-on learning, making them an essential part of a child’s development.


    science and education toys


    What Are STEAM Toys?

    STEAM toys are designed to blend education with fun, encouraging children to explore various concepts in an interactive way. Unlike traditional toys, which primarily focus on entertainment, STEAM toys integrate practical knowledge and problem-solving exercises that improve cognitive skills. They often include:

    • Robotics kits
    • Engineering building sets
    • Coding and programming games
    • Science experiment kits
    • Creative art and design sets

    One great example is the Smart Programming Educational Kit shown in the images above. It combines engineering, programming, and motorized robotics, allowing children to build, code, and control various models through different operating modes.


    Benefits of STEAM Toys for Kids

    1️⃣ Enhances Problem-Solving Skills

    STEAM toys often require critical thinking and logical reasoning. Whether it’s constructing a robotic arm, programming a moving vehicle, or designing a bridge, children learn to troubleshoot issues and think analytically.

    2️⃣ Encourages Creativity & Innovation

    By incorporating arts and engineering, STEAM toys allow children to use their imagination while building functional models. They can modify structures, create their own inventions, and experiment with different outcomes.

    3️⃣ Develops Computational & Logical Thinking

    Toys that involve coding and robotics—such as the Smart Programming Educational Kit—introduce kids to the fundamentals of programming through visual block-based coding. This early exposure helps them understand sequences, loops, and problem-solving strategies.

    4️⃣ Hands-On Learning for Better Retention

    Children retain information better when they actively engage in learning. Building, coding, and experimenting with STEAM toys provide an experiential learning process, making abstract concepts more tangible and easier to understand.

    5️⃣ Prepares Kids for Future Careers

    With the world becoming increasingly technology-driven, skills in robotics, programming, and engineering will be in high demand. STEAM education helps kids gain early exposure to these subjects, setting a foundation for future career opportunities in fields like AI, engineering, and design.

    6️⃣ Boosts Confidence & Independence

    Building complex projects instills confidence in children. As they complete challenging tasks on their own, they gain a sense of accomplishment and improve their problem-solving resilience.


    How to Choose the Right STEAM Toy?

    When selecting a STEAM toy, consider:

    • Age appropriateness – Choose toys that match a child’s developmental stage.
    • Skill level – Some toys require prior knowledge in coding or engineering, while others cater to beginners.
    • Interactivity & engagement – Ensure the toy is hands-on and challenges the child to think creatively.
    • Durability & expandability – Kits that allow for additional modules or future expansions are great for long-term learning.

    The Smart Programming Educational Kit featured in the images is a versatile choice, offering: ✅ 52+ design models ✅ Three operating modes (remote control, app-based, coding) ✅ Motorized smart modules for real-time interactive play ✅ Storage box for easy organization ✅ STEAM-based learning in engineering, programming, and robotics


    STEAM Toys as a Gateway to Learning

    STEAM toys bridge the gap between education and entertainment, transforming playtime into a valuable learning experience. They foster curiosity, creativity, and critical thinking, setting kids up for success in the modern world. Whether it’s coding a robot, designing a 3D structure, or experimenting with physics, these toys empower children to become future innovators.

    Would you consider getting a STEAM toy for a child? What aspects of STEAM education interest you the most? 🚀🔬🎨

  • How to Choose the Right Nozzle for 3D Printers

    How to Choose the Right Nozzle for 3D Printers

    Selecting the right nozzle is a critical aspect of 3D printing that directly influences print quality, speed, and material compatibility. With a variety of nozzle types and materials available, making an informed decision involves understanding both the technical characteristics of the nozzles and the specific requirements of your projects. This article provides a comprehensive guide on how to choose the ideal nozzle for your 3D printer, covering key areas from different nozzle types to practical selection tips.


    1. Overview of Nozzle Types

    Understanding the different types of nozzles available is the first step in making the right choice for your 3D printer.

    1.1 Brass Nozzles

    Description:
    Brass nozzles, such as the popular MK8, are widely used in FDM 3D printing. Brass is an excellent conductor of heat, meaning these nozzles heat up quickly and maintain a consistent temperature throughout the print. This results in smooth extrusion and minimizes the risk of clogs.

    Advantages:

    • High Thermal Conductivity: Quickly reaches and maintains the desired temperature.
    • Cost-Effective: Generally more affordable than nozzles made from harder materials.
    • Ease of Use: Their universal design makes them compatible with many printer models and easy to replace.

    Limitations:

      • Wear Issues: Being relatively soft, brass nozzles may wear down faster, especially when printing with abrasive materials such as carbon fiber or glow-in-the-dark filaments.
      • Limited Durability: Frequent use with abrasive filaments can lead to more frequent nozzle replacements.

    1.2 Hardened Steel Nozzles

    Description:
    Hardened steel nozzles are designed for durability. They are ideal for high-wear applications and abrasive materials that would quickly erode a brass nozzle.

    Advantages:

    • Superior Durability: Resistant to abrasion and suitable for long-term use in demanding applications.
    • Extended Lifespan: They can handle tough materials without degrading, which reduces downtime and maintenance costs.

    Limitations:

    • Lower Thermal Conductivity: These nozzles do not transfer heat as efficiently as brass, potentially requiring adjustments in printing temperature settings.
    • Higher Cost: They are generally more expensive, which might be a consideration for hobbyists or low-budget projects.

    1.3 Other Materials and Coated Nozzles

    Ruby and Tungsten Carbide Nozzles:

    • Description: These high-end nozzles offer excellent wear resistance and thermal performance. They are often used in industrial applications where both durability and precision are critical.
    • Advantages: Extreme longevity, even with abrasive materials.
    • Limitations: Significantly higher cost and specialized requirements.

    Coated Nozzles:

    • Description: Some nozzles feature special coatings designed to reduce friction or wear.
    • Advantages: Can improve filament flow and extend the life of the nozzle.
    • Limitations: The performance benefits vary, and coatings may wear off over time, requiring eventual replacement of the nozzle.

    2. Key Factors to Consider

    When selecting a nozzle, several critical factors should be evaluated to ensure that your choice meets your specific printing requirements.

    2.1 Filament Compatibility

    Material Type:

    • Consider the type of filament you primarily use. Brass nozzles are excellent for standard filaments like PLA, ABS, and PETG, while hardened steel is better for abrasive filaments.
    • Understand that the chemical composition and abrasive properties of different filaments can affect nozzle longevity and performance.

    Application Needs:

    • Evaluate whether your prints require high detail, durability, or a specific surface finish. Different filaments and nozzle materials may interact differently, influencing the final appearance and strength of the printed object.

    2.2 Nozzle Diameter

    Resolution vs. Print Speed:

    • Small Diameters (e.g., 0.2mm to 0.3mm): These nozzles offer higher resolution and finer detail, making them ideal for intricate models or detailed prototypes.
    • Large Diameters (e.g., 0.6mm to 0.8mm): These allow for faster printing and greater material flow, suitable for larger parts or functional prototypes where high resolution is less critical.

    Impact on Layer Adhesion:

    • The diameter of the nozzle affects the width of each extruded line, which in turn influences how well layers bond together. This is particularly important for parts requiring high strength and structural integrity.

    2.3 Thermal Performance

    Heat Transfer Efficiency:

    • The nozzle material must effectively transfer heat to maintain a consistent extrusion temperature. Brass excels in this area, which is crucial for smooth, consistent prints.
    • Evaluate whether your printer’s heating system can compensate for any lower thermal conductivity if you opt for a hardened steel nozzle.

    Temperature Stability:

    • Consistent temperature is vital for avoiding common printing issues like clogs or uneven extrusion. Consider the thermal mass of the nozzle and its ability to adapt quickly to temperature changes.

    2.4 Durability and Wear Resistance

    Usage Environment:

    • For high-volume printing or when using abrasive materials, durability becomes a primary concern. Hardened steel nozzles or those with advanced coatings may offer the best performance.
    • Consider the expected lifecycle of the nozzle in your specific applications. Frequent replacement of lower-durability nozzles can increase long-term costs and downtime.

    Maintenance and Replacement:

    • Factor in how often you are willing or able to replace the nozzle. A more durable nozzle may justify a higher initial investment if it reduces maintenance frequency.

    2.5 Printer Compatibility

    Hardware Integration:

    • Ensure that the nozzle is compatible with your printer’s hotend design. Verify the thread type and dimensions to avoid installation issues.
    • Some printers have specific nozzle designs, and using an incompatible nozzle can affect both print quality and printer safety.

    Ease of Installation:

    • Consider whether your printer allows for quick and simple nozzle changes. Ease of maintenance can be an important factor, especially if you need to switch between different nozzle types frequently.

    3. Practical Tips for Nozzle Selection

    Selecting the right nozzle involves not only understanding the specifications but also practical experimentation and research.

    3.1 Experimentation and Testing

    • Small Test Prints:
      • Run small test prints when switching to a new nozzle type or diameter. This can help you fine-tune settings and verify that the chosen nozzle meets your quality standards.
    • Document Results:
      • Keep a record of different nozzle types and their performance under various conditions. This information can be invaluable for future projects and troubleshooting.

    3.2 Consult Manufacturer Guidelines

    • Printer and Filament Recommendations:
      • Always refer to the manufacturer’s documentation for both your printer and the filaments you use. Manufacturers often provide optimal settings and compatibility information that can guide your selection.
    • Community Feedback:
      • Leverage online forums and user reviews to gather insights from others who have used the same nozzle types. Real-world experiences can highlight potential issues and benefits that may not be apparent from specifications alone.

    3.3 Future-Proofing Your Setup

    • Anticipate Needs:
      • Consider not only your current projects but also future applications. Choosing a nozzle that can handle a variety of materials and resolutions may save time and money in the long run.
    • Versatility:
      • If you foresee the need to print with both standard and abrasive materials, you might consider having multiple nozzle types on hand for different projects.

    4. Conclusion

    Choosing the right nozzle for your 3D printer is a multifaceted process that requires a careful balance of filament compatibility, nozzle diameter, thermal performance, durability, and printer compatibility. The brass MK8 nozzle is an excellent choice for many standard applications due to its affordability and excellent heat transfer, while alternatives like hardened steel or coated nozzles may be better suited for abrasive or high-volume printing.

    By comprehensively evaluating your printing needs and considering both current and future requirements, you can select a nozzle that not only enhances print quality and efficiency but also contributes to the overall longevity and reliability of your 3D printing setup. Experimentation, thorough research, and adherence to manufacturer guidelines are key to making an informed decision. Ultimately, the right nozzle will empower you to achieve superior print quality and unlock the full potential of your 3D printer.

    Happy printing, and may your projects be successful and innovative!

  • Brass Knurled Threaded Heat Resistant Nut Inserts: A Comprehensive Guide

    Brass Knurled Threaded Heat Resistant Nut Inserts: A Comprehensive Guide

    Brass Knurled Threaded Heat Resistant Nut Inserts

    Brass knurled threaded heat resistant nut inserts are a specialized fastening solution designed for applications that require robust mechanical performance, resistance to high temperatures, and reliable thread engagement. Combining the benefits of brass with a knurled exterior surface, these inserts provide improved grip, secure fastening, and enhanced durability in demanding environments. This article offers an in-depth look at brass knurled threaded heat resistant nut inserts, explains their benefits, highlights common applications, and provides practical guidance on how to use and install them effectively.


    1. Introduction

    In industries where thermal stability and mechanical strength are crucial, brass knurled threaded heat resistant nut inserts offer a reliable solution. They are engineered to withstand high temperatures while maintaining strong thread engagement in softer base materials such as aluminium, plastics, or sheet metal. Their distinctive knurled surface not only improves grip during installation but also contributes to better resistance against loosening in vibrating or high-stress environments. This guide aims to assist engineers, designers, and technicians in understanding and selecting the right nut inserts for their applications.


    2. What Are Brass Knurled Threaded Heat Resistant Nut Inserts?

    Brass knurled threaded heat resistant nut inserts are hardware components that create a durable, heat-stable threaded interface in materials that might not inherently provide strong threads. They are constructed from brass—a material known for its corrosion resistance, thermal stability, and excellent machinability—and feature a knurled exterior that enhances installation grip and retention.

    2.1 Key Features

    • Heat Resistance: Designed to withstand high temperatures without compromising structural integrity.
    • Knurled Surface: Provides extra grip during installation and helps prevent loosening under vibration.
    • Strong Thread Engagement: Ensures a reliable, long-lasting threaded connection even in softer base materials.
    • Corrosion Resistance: Brass is naturally resistant to corrosion, making these inserts suitable for harsh environments.
    • Ease of Replacement: They can be installed or replaced without significant damage to the surrounding material, facilitating maintenance.

    3. Benefits of Using Brass Knurled Threaded Heat Resistant Nut Inserts

    Choosing brass knurled threaded heat resistant nut inserts can offer several advantages in your assembly processes:

    • Enhanced Mechanical Performance: The combination of brass’s strength and the knurled texture provides improved load distribution and resistance to wear.
    • Thermal Stability: These inserts maintain their integrity in high-temperature applications, reducing the risk of thread failure due to heat.
    • Improved Safety: The secure thread engagement minimizes the likelihood of fastener loosening, which is critical in dynamic or high-vibration environments.
    • Long-Term Durability: Their resistance to corrosion and wear extends the life of the assembly, reducing maintenance costs.
    • Versatility: They can be used in a variety of materials and applications, making them a flexible option for many industries.

    4. Applications

    Brass knurled threaded heat resistant nut inserts are widely used across different sectors where their unique properties provide significant advantages:

    4.1 Industrial Machinery

    Used in machines that operate at elevated temperatures or experience constant vibration, these inserts ensure reliable fastenings for moving parts and critical components.

    4.2 Automotive and Aerospace

    Their heat resistance and secure engagement make them ideal for automotive and aerospace applications, where components are often exposed to extreme conditions.

    4.3 Electronics and Enclosures

    In electronic housings and enclosures, the inserts help create robust, reliable threaded connections in materials that might otherwise be prone to wear and failure.

    4.4 Consumer Products

    For appliances and consumer products requiring a combination of aesthetic appeal, durability, and thermal stability, these inserts provide a balance of functionality and visual quality.


    5. How to Use Brass Knurled Threaded Heat Resistant Nut Inserts

    Proper installation and usage of these inserts are essential for achieving optimal performance. The following steps outline the process for incorporating them into your assembly:

    5.1 Preparing the Base Material

    • Material Selection: Verify that the base material (e.g., aluminium, plastic, or sheet metal) is compatible with the brass insert.
    • Drilling the Hole: Create a hole in the base material that matches the recommended size for the insert. Precision in drilling is crucial to ensure a tight fit.
    • Deburring: Smooth any rough edges around the drilled hole to facilitate the proper seating of the insert and prevent damage during installation.

    5.2 Inserting the Nut Insert

    • Alignment: Position the brass knurled threaded nut insert over the prepared hole. Ensure that the orientation of the knurled surface is correct for optimal grip.
    • Installation: Depending on the design, either press-fit or use a specialized insertion tool to secure the insert. The knurled surface should grip the material firmly, preventing any movement.
    • Verification: Once installed, verify that the insert is flush with the surface and that the threads are properly aligned. Use a thread gauge or perform a test assembly to confirm the secure installation.

    5.3 Fastening and Final Assembly

    • Screw/Bolt Compatibility: Ensure that the fasteners used match the thread specification of the insert.
    • Torque Application: Apply the recommended torque during fastening to prevent over-tightening, which could damage the insert or the surrounding material.
    • Inspection: Regularly inspect the assembly for any signs of wear or loosening, particularly in high-stress or high-temperature environments.

    6. Tips and Best Practices

    To maximize the performance and longevity of brass knurled threaded heat resistant nut inserts, consider the following best practices:

    • Use Appropriate Tools: Invest in proper installation tools to ensure the insert is seated correctly without damaging the knurled surface.
    • Follow Manufacturer Guidelines: Always consult the manufacturer’s recommendations for hole sizes, installation methods, and torque settings.
    • Maintain a Clean Environment: Keep the installation area free of debris and contaminants to ensure a secure fit.
    • Routine Maintenance: Periodically check assemblies for signs of wear or movement, especially in applications subject to high vibration or temperature fluctuations.
    • Document Settings: Record the optimal installation parameters for future reference, especially if the assembly will be replicated in multiple units.

    7. Conclusion

    Brass knurled threaded heat resistant nut inserts offer a robust solution for creating durable threaded connections in a variety of materials, particularly in applications where thermal stability and mechanical performance are critical. Their unique design, combining the resilience of brass with a knurled surface for improved grip, makes them an ideal choice for industrial machinery, automotive components, aerospace applications, and consumer products. By following proper installation procedures and best practices, engineers and technicians can ensure that these inserts perform reliably, contributing to the overall strength and longevity of their assemblies. Embrace the benefits of these specialized inserts to achieve more secure, durable, and efficient designs in your next project.

    Happy assembling!

  • How to Choose the Right Filament for FDM 3D Printers

    How to Choose the Right Filament for FDM 3D Printers

    Selecting the right filament for your Fused Deposition Modelling (FDM) 3D printer is a critical decision that influences print quality, durability, and overall project success. This article outlines the various filament types available, key factors to consider when making a selection, and practical tips to optimize filament usage. Each section is designed to provide in-depth information to help both beginners and experienced users make informed decisions.

    1. Introduction

    FDM 3D printing has become a cornerstone technology for rapid prototyping and small-scale manufacturing. The quality of prints depends heavily on the choice of filament, which serves as the building material for your prints. Understanding the characteristics of each filament type, alongside the requirements of your specific application, is essential for achieving optimal results. This article aims to guide you through the selection process by explaining the different types of filaments, discussing key factors such as application requirements, printer compatibility, and environmental considerations, and offering practical tips for handling and storing filament.


    1. Understanding Filament Types

    In this section, we delve into the most common types of filaments used in FDM printing. Each type has distinct properties that make it suitable for different applications.

    2.1 PLA (Polylactic Acid)

    • Overview: PLA is a biodegradable and user-friendly filament, ideal for beginners.
    • Properties: It has low warping tendencies, a low printing temperature, and is environmentally friendly.
    • Applications: Best suited for decorative items, prototypes, and models where high heat resistance is not required.

    2.2 ABS (Acrylonitrile Butadiene Styrene)

    • Overview: ABS is a strong and durable filament used widely in industrial applications.
    • Properties: It offers high impact resistance and toughness but requires a heated bed and often an enclosed build chamber to minimize warping.
    • Applications: Suitable for functional parts, automotive components, and prototypes that require greater durability.

    2.3 PETG (Polyethylene Terephthalate Glycol)

    • Overview: PETG combines the ease of printing of PLA with the strength and durability of ABS.
    • Properties: It is less prone to warping, offers good chemical resistance, and maintains clarity if desired.
    • Applications: Often used for parts that require both strength and a bit of flexibility, such as protective cases and mechanical components.

    2.4 Nylon

    • Overview: Nylon is known for its high strength, flexibility, and durability.
    • Properties: It can withstand significant wear and tear, though it is more challenging to print due to moisture sensitivity and higher required temperatures.
    • Applications: Ideal for mechanical parts, gears, and tools that are subjected to repeated stress.

    2.5 TPU (Thermoplastic Polyurethane)

    • Overview: TPU is a flexible filament, distinct from the rigid nature of most other materials.
    • Properties: It offers excellent elasticity and resistance to impact, making it suitable for parts that need to bend or flex.
    • Applications: Commonly used for printing phone cases, seals, gaskets, and other components that require flexibility.


    1. Key Factors to Consider

    Choosing the right filament is not solely about understanding material properties; several other factors must be taken into account to ensure the best possible outcome for your 3D printing project.

    3.1 Application Requirements

    • Purpose: Define the primary function of your printed object.
    • Strength and Durability: Select materials like ABS or Nylon for parts requiring high durability.
    • Aesthetics: For decorative items or prototypes, PLA may suffice.

    3.2 Printer Compatibility

    • Hardware Limitations: Confirm that your printer can handle the material’s required temperature range and that it is equipped with features like a heated bed or enclosed build chamber if needed.
    • Software Settings: Verify that your slicing software supports the filament type, and adjust print settings accordingly.

    3.3 Environmental Conditions

    • Operating Environment: Consider where the final product will be used. For example, PLA might not be suitable for high-temperature applications or outdoor use, whereas ABS and PETG are more resilient.
    • Exposure to Elements: Materials like PETG and Nylon are more resistant to moisture and UV light compared to PLA.

    3.4 Print Settings

    • Temperature: Each filament requires a specific nozzle and bed temperature range for optimal printing.
    • Speed and Cooling: Adjust print speeds and cooling fans based on the filament’s characteristics to avoid issues like warping or stringing.
    • Layer Adhesion: Consider the layer adhesion properties of the material to ensure structural integrity.

    3.5 Cost and Availability

    • Budget: Filament prices vary by material and brand.
    • Quality: Investing in high-quality filament can lead to better print consistency and fewer failures.
    • Local Supply: Consider the availability of the filament in your region to avoid supply issues.


    1. Practical Tips for Filament Use

    In addition to selecting the right filament, proper handling and maintenance are crucial for achieving optimal print quality.

    4.1 Storage

    • Moisture Control: Use airtight containers with desiccants to store filament, especially moisture-sensitive types like Nylon and TPU.
    • Temperature Regulation: Store filament in a cool, dry place away from direct sunlight to prevent degradation.

    4.2 Calibration

    • Regular Calibration: When switching between filament types, recalibrate your printer to adjust temperature, retraction, and speed settings.
    • Test Prints: Run small test prints when using new filament to fine-tune settings before committing to a larger project.

    4.3 Experimentation

    • Brand Comparison: Don’t hesitate to try different brands and types to see which performs best with your printer.
    • Parameter Adjustments: Experiment with various settings to optimize print quality, and document your findings for future reference.


    1. Conclusion

    Choosing the right filament for your FDM 3D printer is a multifaceted decision that can significantly impact the quality, strength, and appearance of your printed objects. By understanding the unique properties of different filament types and considering key factors such as application requirements, printer compatibility, environmental conditions, and cost, you can make an informed decision that best suits your project needs. Additionally, following best practices for storage, calibration, and experimentation will further enhance your printing experience. Ultimately, the careful selection and proper use of filament are essential steps towards achieving durable, precise, and aesthetically pleasing 3D printed parts.


  • Вавада зеркало для безопасной игры в интернете


    Вавада зеркало для безопасной игры в интернете


    Выбор надежного источника для развлечений в сети имеет первостепенное значение. Главное – избегать рисков, связанных с несанкционированным доступом и мошенничеством. Если вам необходимо обеспечить стабильный доступ к развлечениям, целесообразно пользоваться проверенными ссылками, такими как vavada casino. Это поможет минимизировать возможные затруднения и неприятности.

    Постоянно обновляйте свои знания о новых методах безопасности. Используйте VPN-сервисы и современные браузеры с встроенными средствами защиты от фишинга и вредоносного ПО. Следите за обновлениями программного обеспечения для устранения уязвимостей и повышением эффективности в вопросах защиты личных данных.

    Также стоит обратить внимание на репутацию площадок и отзывы пользователей. Информация о других игроках может оказать значительное влияние на ваши решения. Не забывайте про методы двухфакторной аутентификации для повышения защиты учетной записи – это заметно снизит риск несанкционированных действий.

    Как найти актуальное зеркало Вавада для доступа к сайту

    Обратитесь к проверенным форумам, где собрано множество отзывов пользователей о доступных ссылках. Люди делятся надежными источниками, что значительно упростит поиск рабочего адреса.

    Воспользуйтесь социальными сетями. На площадках, таких как Telegram или ВКонтакте, существуют группы, посвященные азартным платформам. Участники часто публикуют актуальную информацию о доступных адресах.

    Не забывайте о специальных веб-сайтах, которые обновляются регулярно. Многие ресурсы отслеживают изменения и предоставляют свежие ссылки на альтернативные площадки.

    Источник Тип информации
    Форумы Отзывы и ссылки
    Социальные сети Сообщения пользователей
    Специальные сайты Актуальные ссылки

    Подпишитесь на рассылки от проверенных сайтов, освещающих азартные развлечения. Часто они отправляют уведомления с актуальными ссылками на свои платформы, что сэкономит ваше время.

    Следите за новостями на официальном сайте. Там могут размещать информацию о текущих или временно недоступных адресах, а также рекомендации по их получению.

    Используйте VPN-сервисы для обхода блокировок. Это может помочь не только получить доступ, но и сделает вашу активность менее заметной для провайдеров.

    Обратитесь к друзьям или знакомым, которые уже имеют опыт взаимодействия с данной площадкой. Коллективный обмен информацией может привести к быстрому нахождению актуальных ссылок.

    Безопасные методы входа через зеркало Вавада: советы и рекомендации

    Всегда проверяйте URL-адрес перед входом на ресурс. Используйте только ссылки, полученные с официальных каналов, таких как социальные сети или рассылки. Избегайте переходов по подозрительным предложениям и рекламе.

    Защита учетной записи

    • Активируйте двухфакторную аутентификацию. Это обеспечит дополнительный уровень защиты, требуя подтверждение входа через SMS или приложения.
    • Применяйте сложные пароли, сочетающие буквы, цифры и символы. Не используйте одинаковые пароли на разных ресурсах.
    • Регулярно меняйте пароль и следите за своей учетной записью на наличие подозрительных действий.

    Общая безопасность

    Установите обновления программного обеспечения и антивирусные решения. Это поможет защитить вашего устройства от вредоносного ПО, которое может угрожать безопасности вашей информации. Не забывайте, что использование надежных VPN-сервисов также может значительно повысить уровень конфиденциальности и защиты ваших данных в сети.

    Что делать в случае блокировки зеркала Вавада: альтернативные решения

    Используйте VPN-сервисы. Они обеспечивают анонимный доступ к ресурсам, изменяя ваш IP-адрес. Установите проверенное приложение, выберите сервер, и вы сможете обойти ограничения. Это надёжный метод, который защищает вашу информацию.

    Другой вариант – прокси-серверы. Эти инструменты создают промежуточное соединение между вашим устройством и нужным сайтом, предоставляя доступ к заблокированным платформам. Обратите внимание на скорость работы и безопасность прокси, чтобы избежать вирусов и утечек данных.

    Наконец, рассмотрите использование альтернативных ссылок, которые публикуются на специализированных форумах и сообществах. Следите за обновлениями и проверяйте их достоверность. Это поможет вам оставаться в курсе актуальных адресов и обеспечит доступ к нужному ресурсу.


  • Fansbet Welcome Offer: A Practical Guide to Getting Started

    Online casinos vary widely in quality — this guide cuts through the noise and covers only what actually matters for a smooth experience. Whether you are new to Fansbet or just need a refresher, this walkthrough covers registration, mobile play, bonus mechanics, and responsible gambling tools. By the end, you will know exactly how to claim and use the Fansbet bonus, with a clear math example to avoid surprises.

    Quick Checklist

    • Confirm you meet the minimum age (18+ or 20+ depending on jurisdiction).
    • Have a valid email and phone number for verification.
    • Prepare a payment method: credit/debit card, e-wallet, or bank transfer.
    • Read the welcome offer terms: wagering requirements, minimum odds, and eligible games.
    • Decide on a deposit amount that fits your budget — never chase losses.

    Registration

    1. Visit the Fansbet website using the secure link provided at Fansbet welcome offer, and click the “Sign Up” button.
    2. Fill in the registration form with your personal details: full name, date of birth, email, and address. Use information that matches your ID documents, as this speeds up verification.
    3. Create a unique username and a strong password. Enable two-factor authentication (2FA) if offered — it adds a layer of security to your Fansbet login.
    4. Agree to the terms and conditions, then submit the form. You will receive a confirmation email; click the link inside to activate your account.
    5. Complete the KYC (Know Your Customer) process by uploading a photo ID and proof of address. This is mandatory for withdrawals, so do it early.
    6. Make your first deposit. Check if the welcome offer requires a minimum deposit (often $10 or €10). Once deposited, the bonus is credited either automatically or via a promo code.

    Playing on Mobile

    Fansbet offers a mobile-optimized website that works seamlessly on smartphones and tablets. You do not need to download an app from a store; simply open your browser and go to the Fansbet site. The layout adapts to your screen, and you can access all features, including the Fansbet bonus, live chat, and payment methods. For quick access, add the site to your home screen as a progressive web app (PWA). This gives you an app-like experience without consuming storage. The Fansbet app, if referenced, is effectively this PWA — launch it from your browser and log in with your credentials.

    How Bonuses Work

    Bonuses are a core part of online casino offers, but understanding the fine print is crucial. The Fansbet welcome offer typically matches your first deposit by a certain percentage, up to a specified maximum amount. For example, if the offer is a 100% match up to $200, a $100 deposit yields an extra $100 in bonus funds, giving you $200 to play with.

    However, the bonus money is not withdrawable immediately. You must meet wagering requirements, which are a multiplier of the deposit plus bonus. Let’s calculate:

    Suppose you deposit $50, and the bonus is 100% up to $100. Your total balance is $100 (deposit + bonus). If the wagering requirement is 30x the deposit plus bonus, you must wager 30 * $100 = $3,000 before withdrawing any winnings from the bonus.

    Mathematically, the formula is: (Deposit + Bonus) × Wagering Multiplier = Total Wagering Requirement. In this case: ($50 + $50) × 30 = $3,000. This must be wagered on eligible games, and different games contribute differently (slots usually 100%, table games often less). Check the terms to see which games count fully.

    Also, note that some offers include a time limit (e.g., 7 days) to meet the requirement. If you fail, the bonus and any winnings from it are forfeited. Plan your play accordingly.

    Good to Know

    Responsible gambling tools are essential for a safe experience. Fansbet provides deposit limits, which allow you to cap how much you can deposit in a day, week, or month. You can set these in your account settings. Session limits remind you to take breaks after a specified playtime, and self-exclusion lets you block access for a chosen period (from 24 hours to permanent). Use these tools proactively to keep gambling fun and under control.

    Need to Know

    What is the minimum deposit for the Fansbet welcome offer?

    The minimum deposit varies by payment method and jurisdiction, but it is typically $10 or €10. Always check the terms in your region.

    Are there any fees for deposits or withdrawals?

    Most credit and debit cards have no fees from Fansbet, but e-wallets may charge a small fee. Withdrawals are usually free, but delays can occur if you use a method that incurs bank charges.

    How long does a withdrawal take?

    Withdrawal times depend on the method. E-wallets take up to 24 hours, cards take 2–5 business days, and bank transfers may take longer. KYC verification must be complete before the first withdrawal.

    Can I use the Fansbet bonus on live dealer games?

    Usually, live dealer games contribute less to wagering requirements or may be excluded entirely because of their high return-to-player (RTP). Check the specific bonus terms for eligible games.

    Remember: if you are at a Curacao-licensed casino, winnings may be subject to local income tax in your country, unlike in some EU jurisdictions. Always check your local tax laws as a responsible user.

    What should I do if I forget my Fansbet password?

    Use the “Forgot Password” link on the login page. Fansbet will send a reset link to your registered email. For security, also consider enabling 2FA to prevent unauthorized access.

    Conclusion: Getting started with the Fansbet welcome offer is straightforward if you follow the steps outlined above. Pay attention to wagering requirements, use the mobile site for convenience, and never gamble more than you can afford. Set limits and enjoy the experience responsibly.

  • 1xBet kazino ceļvedis: reģistrācija, bonusi un drošība

    Before depositing at any online casino, take five minutes to read this checklist — it covers the steps most players skip. This guide walks you through the entire process at kazino 1xBet, from creating an account to understanding the bonus mathematics, payment methods, and what to do if something goes wrong. We’ll also look at licensing and player protection, so you can play with confidence.

    Prerequisites

    • A stable internet connection and a modern browser (Chrome, Firefox, Safari, or Edge).
    • A valid email address or active phone number for account verification.
    • Personal identification documents (passport, ID card, or driver’s license) for KYC checks when you request a withdrawal.
    • A payment method that supports deposits and withdrawals — credit/debit cards, e-wallets, or bank transfer.
    • At least 18 years of age (or the legal gambling age in your jurisdiction).
    • Understanding of local tax laws — winnings from a Curaçao-licensed casino may be subject to income tax in your country.

    Registration

    1. Visit the official 1xBet website. Look for the kazino 1xBet in the header or main menu.
    2. Click the “Registration” button. You’ll be offered several options: one-click registration, by phone, by email, or via social networks. Choose the one that suits you best.
    3. Fill in the required fields. For email registration, provide a valid email address and create a strong password (avoid common words, use a mix of letters, numbers, and symbols).
    4. Select your preferred currency. This is important — it may be difficult to change later.
    5. Agree to the terms and conditions, and confirm you are of legal age. Click “Register”.
    6. Verify your account. For email, click the link in the confirmation email. For phone, enter the code sent via SMS.
    7. Complete your profile: add your full name, date of birth, and address. This is required for later withdrawals.

    Bonus Mathematics

    Bonuses are a key part of any casino experience, but understanding the math behind them is essential. At 1xBet, the welcome bonus typically matches your first deposit up to a certain amount. Let’s break down a typical example.

    Assume the bonus is a 100% match up to €100. You deposit €50, so you receive a €50 bonus. Your total balance becomes €100 (€50 real money + €50 bonus).

    The bonus comes with a wagering requirement of 35x. This means you must place bets totaling 35 times the bonus amount before you can withdraw any winnings from it.

    Calculation: 35 × €50 = €1750. So you need to bet €1750 in total. If the average game return (RTP) is 96%, you can expect to lose about 4% of that on average, so the expected cost of meeting the requirement is 0.04 × €1750 = €70. Since your bonus is only €50, the expected value is negative, so you should view bonuses as a way to extend playtime, not as a guaranteed profit.

    Also note that not all games contribute equally to wagering requirements. Slots usually contribute 100%, while table games may contribute only 10% or even 0%. Always check the bonus terms.

    Game Type Contribution to Wagering
    Slots 100%
    Table Games (Blackjack, Roulette) 5-10%
    Video Poker 10-20%
    Live Casino 0-10%

    To meet wagering requirements efficiently, focus on slots with high RTP and 100% contribution. This reduces the house edge and helps you clear the bonus faster.

    Payment Methods

    1xBet supports a wide range of payment options. Common methods include:

    • Credit/Debit Cards: Visa, Mastercard
    • E-wallets: Skrill, Neteller, ecoPayz, WebMoney
    • Bank Transfers
    • Cryptocurrencies: Bitcoin, Ethereum, Litecoin
    • Paysafecard for prepaid deposits

    Deposits are usually instant; withdrawals take from a few minutes to a few days depending on the method. For example, e-wallets process within hours, while bank transfers may take 1-5 business days. Always check the minimum and maximum limits for each method.

    Licence & Player Protection

    1xBet operates under a Curaçao eGaming license. This is a common license for online casinos, but it offers less protection than licenses from major regulators like the UK Gambling Commission or Malta Gaming Authority. As a player, you should be aware that in many EU countries, winnings from Curaçao-licensed casinos may be subject to local income tax. Always check your local tax regulations. For player protection, 1xBet uses SSL encryption to secure data, and they offer responsible gambling tools such as deposit limits and self-exclusion. However, the level of protection is not as comprehensive as with MGA-licensed sites.

    When Things Go Wrong

    Even with a reliable casino, issues can arise. Here are common scenarios and how to handle them:

    1. Withdrawal delay: If your withdrawal is pending longer than the stated time, contact support. They may ask for additional KYC documents. Always ensure your KYC is completed early.
    2. Account locked: This usually happens due to multiple accounts or suspected fraud. Contact support and verify your identity.
    3. Bonus not credited: Check if you used a bonus code during registration. If not, contact support with your deposit details.
    4. Technical problems with games: Clear your browser cache, disable extensions, or try a different browser. If the game crashes mid-round, contact support.
    5. Disagreement about winnings: Take screenshots of the game history and bet slips. File a complaint through the casino’s complaint procedure.
    6. Unauthorized transactions: Immediately freeze your payment method and contact both your bank and the casino support.

    Need to Know

    Is it safe to play at 1xBet?

    1xBet has a Curaçao license and uses SSL encryption to protect your data. However, always play responsibly and be aware of the lower level of regulatory oversight compared to MGA-licensed casinos.

    How do I claim the welcome bonus?

    After registration, you typically need to make a deposit and enter a bonus code if required. The bonus is credited automatically or after contacting support, depending on the terms.

    Can I play on my mobile device?

    Yes, 1xBet offers a mobile-optimized website and a progressive web app (PWA). Simply open the site in your smartphone browser and add it to your home screen for easy access.

    What is the minimum deposit?

    The minimum deposit varies by payment method, usually around €1 for e-wallets and €10 for cards. Check the casino’s banking page for exact figures.

    How long do withdrawals take?

    Withdrawals to e-wallets can be processed within hours, while card and bank transfers may take up to 5 business days. The first withdrawal may take longer due to KYC.

    Can I set deposit limits?

    Yes, 1xBet provides responsible gambling tools, including deposit limits. You can set them in your account settings under “Responsible Gaming”.

    Good to Know

    If you experience a delayed withdrawal, follow these steps: First, verify that your KYC documents have been submitted and approved. Second, check the withdrawal method — e-wallets are faster. Third, contact support via live chat or email. State your account ID, the withdrawal amount, and the date of the request. If there is no response within 24 hours, escalate to the complaints department. If still unresolved, you can contact the Curaçao eGaming licensing authority (assuming they respond). Typical processing times are up to 24 hours for approval and up to 3-5 business days for transfer.

    In conclusion, 1xBet offers a comprehensive online casino experience with a variety of games, bonuses, and payment options. By following the steps in this guide, you can navigate registration, understand bonus mechanics, and protect yourself as a player. Always gamble responsibly and stay informed about the rules and regulations that apply to you.

  • Spinanga casino-opas: rekisteröidy ja pelaa hetkessä

    Most iGaming guides are vague. This one is not — every step here is specific, actionable, and based on how the platform actually works. Tämä opas vie sinut läpi Spinanga-kasinon kirjautumisen, rekisteröitymisen ja pelivalikoiman, jotta pääset heti nauttimaan pelikokemuksesta.

    Before You Start

    Varmista ennen aloittamista, että sinulla on seuraavat asiat valmiina:

    • Voimassa oleva sähköpostiosoite ja puhelinnumero.
    • Henkilötiedot (nimi, syntymäaika, osoite) verifiointia varten.
    • Maksutapa, esimerkiksi pankkikortti, verkkolompakko tai kryptovaluutta.
    • Vakaa internetyhteys ja laite, joka tukee mobiilioptimoitua verkkosivustoa.

    Registration

    Rekisteröityminen Spinanga-kasinolla on nopeaa ja suoraviivaista. Noudata näitä vaiheita:

    1. Siirry Spinanga com etusivulle ja klikkaa “Rekisteröidy”-painiketta.
    2. Täytä lomakkeeseen sähköpostiosoite, haluamasi salasana ja valuutta (esim. eurot).
    3. Syötä henkilötietosi ja vahvista, että olet täysi-ikäinen ja hyväksyt käyttöehdot.
    4. Vahvista sähköpostiosoitteesi klikkaamalla linkkiä, jonka saat ilmoittamaasi sähköpostiin.
    5. Kirjaudu sisään, tee ensimmäinen talletus ja hyödynnä mahdollinen tervetuliaisbonus, joka voi olla jopa tietty prosenttiosuus talletuksesta.

    What Makes It Stand Out

    Spinanga-kasino erottuu edukseen monipuolisella pelivalikoimallaan ja käyttäjäystävällisellä käyttöliittymällä. Spinanga casino online tarjoaa satoja kolikkopelejä, pöytäpelejä ja live-jakajan pelejä tunnetuilta pelivalmistajilta. Spinanga casino login on suunniteltu sujuvaksi, ja kirjautumisen jälkeen pääset nopeasti käsiksi suosikkipeleihisi. Yksi merkittävä etu on nopeat kotiutukset: useimmat maksutavat käsitellään 24 tunnin sisällä. Alla on yhteenveto tyypillisistä kotiutusajoista.

    Maksutapa Kotiutusaika
    Pankkikortti 1–3 arkipäivää
    Verkkolompakko 0–24 tuntia
    Kryptovaluutta 0–24 tuntia

    Huomaa, että Spinanga toimii Curacao-lisenssillä. Suomalaisille pelaajille tämä tarkoittaa, että mahdolliset voitot voivat olla paikallisen tuloverotuksen alaisia. Suosittelemme tarkistamaan oman verotuksesi ennen suurten voittojen nostamista.

    Yhteenveto

    Spinanga tarjoaa viihtyisän ja luotettavan peliympäristön niin uusille kuin kokeneillekin pelaajille. Muista pelata vastuullisesti, aseta itsellesi rajat ja pidä pelaaminen viihdyttävänä.

Select the fields to be shown. Others will be hidden. Drag and drop to rearrange the order.
  • Image
  • SKU
  • Rating
  • Price
  • Stock
  • Availability
  • Add to cart
  • Description
  • Content
  • Weight
  • Dimensions
  • Additional information
Click outside to hide the comparison bar
Compare